Quick Start Guide
This quick start guide describes how to get started with Drill4Net. For CI/CD integration see this guide.
1. Perform One Time Setup#
Perform a one time setup before you continue with this guide.
2. Run Drill4Net Injector#
After application under test and project with tests are built run Drill4Net Injector.
Make sure that application under test assembly and assembly with tests are not rebuilt before running tests. Drill4Net Scanner and Drill4Net Injector make some important modifications to the assembly to make Drill4Net solution work.
3. Explore Coverage#
Run your tests from assembly provided to Drill4Net Injector.
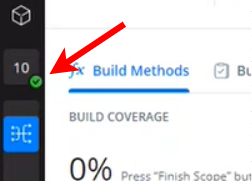
A green circle with a checkmark inside should appear next to the agent icon in the Drill4J Admin, indicating that the agent is active.
Now you can explore covered methods and their associated tests, information about each tests, and coverage percent.
Click here to view coverage information
4. Explore New Build Coverage and Risks#
Let's say the development team made some modifications to application under test code an the new build is ready.
- Simply run Drill4Net Scanner for new build
but this time change value of
adminAgentConfig:buildVersionin appsettings.yml to new build version value (any value that differs from previous build version). - You should see the upadated information about coverage along with Risks (method modified since last build) and
Tests to run (tests that should run to cover risks).
Click here to view Risks and Tests to Run
5. Cover Risks#
- Run Drill4Net Injector for a new assembly with tests build.
- Run your tests from assembly provided to Drill4Net Injector. Change value of
AdminAgentConfig:BuildVersionin drill4netsettings.yml to new build version value (the same version, you specified for Drill4Net Scanner in previous step). - Now you can see that the risks are covered with tests.
Click here to view covered Risks